Twitter and Facebook have been around for quite some time now, but it seems like everyone has really embraced the culture and has started to use them at true channels of content distribution (and consumption). All of the blogs that we produce are built using WordPress, which gives us tremendous flexibility for extending the functionality both with the open source community contributing plugins and with a few of our own. One of the difficult tasks can be sifting through the 10 plugins that were created to do the same thing, in this case update your status on Facebook and/or post a tweet to Twitter.
Up until now we have been using Twitter Tools as the primary method for posting a tweet whenever a new blog post is published. (Twitter Tools is a well built and well maintained plugin that would still recommend, despite moving away from it.) We recently made the decision to move the feed of the site to Feedburner. Feedburner opens up some additional options for promoting and publicizing your feed content, including a ‘post to twitter’ option. Because we have decided to use Feedburner for the blog feed anyway, it seemed to make sense to use this for updated the Twitter feed as well. This will allow us to remove the Twitter Tools plugin and reduce ‘clutter’ as well as have one less plugin to keep up to date and functioning correctly.
Additionally NUAMPS finally has a Facebook Fan Page. Which is a-whole-nother beast to get to update without using something like Networked Blogs, see step #5.
So you want to know the nuts and bolts of how we set all this up? Here it is:
0. Prerequisites
- Functioning WordPress blog
- Google account
- Twitter account
- Facebook account and page
1. Claim your Feedburner Feed
- Go to http://feedburner.google.com and either click “Claim your feed” or login with your Google account
- Follow the instructions to “Burn your feed”
- We will come back to the configuration for your feed
2. Install Feedburner Feedsmith on your WordPress site
- Go here: http://www.google.com/support/feedburner/bin/answer.py?hl=en&answer=78483
- Download Feedburner Feedsmith and follow the installation instructions
3. Configure Feedburner within your WordPress site
- Go to Settings -> Feedburner
- Add your feed
- Save (as always)

4. Configure your Feedburner / Twitter settings
- After logging into Feedburner
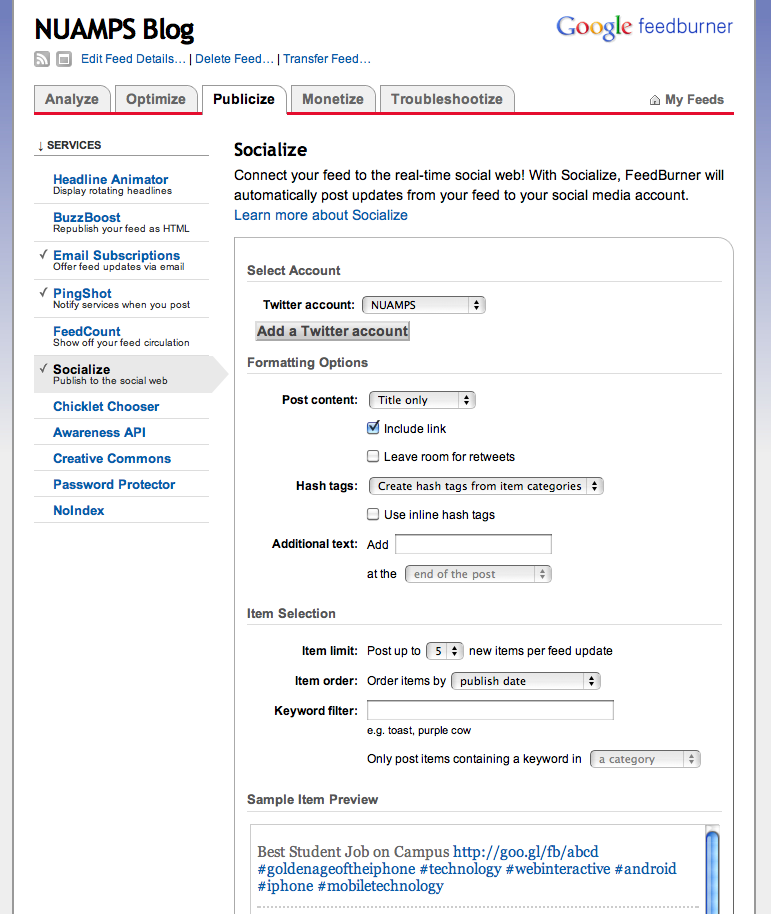
- Go to your feed, then the Publicize tab (horizontal), then the Socialize tab (vertical)
- Click add Twitter account
- Allow Google access to your Twitter account
- We are allowing Feedburner to automatically add hashtags to the tweets
- Configure Feedburner however you would like beyond this (we are using Email Subscriptions and PingShot)

5. Configure Facebook
- Download and install WPBook plugin.
- Follow the WPBook installation document (no sense in re-creating it)
6. Publish a test post or two and you’re done!
I hope this helps! With all of the options out there sometimes you just need someone to point you in the right direction. Feel free to modify or copy these instructions, just give NUAMPS a little love!
